Google Tenant Configuration
Please follow these steps to allow the Bromcom MIS to use your Google Tenant:
- Go to https://admin.google.com and log in with a Super Administrator account
- Click Left Top Menu
- Select Security > API Controls
- Click Manage Domain Wide Delegation
- Click Add New
- In the box for the Client ID, enter the following:

7. In the box for OAuth Scopes, enter the following:
https://www.googleapis.com/auth/admin.directory.user,https://www.googleapis.com/auth/admin.directory.user.readonly,https://www.googleapis.com/auth/admin.directory.userschema,https://www.googleapis.com/auth/admin.directory.userschema.readonly,https://www.googleapis.com/auth/cloud-platform,https://www.googleapis.com/auth/admin.directory.orgunit,https://www.googleapis.com/auth/admin.directory.orgunit.readonly,https://www.googleapis.com/auth/admin.directory.group.member,https://www.googleapis.com/auth/admin.directory.group.member.readonly,https://www.googleapis.com/auth/admin.directory.group,https://www.googleapis.com/auth/admin.directory.group.readonly,https://www.googleapis.com/auth/apps.groups.settings,https://www.googleapis.com/auth/admin.directory.resource.calendar,https://www.googleapis.com/auth/admin.directory.resource.calendar.readonly,https://www.googleapis.com/auth/classroom.courses,https://www.googleapis.com/auth/classroom.courses.readonly,https://www.googleapis.com/auth/classroom.rosters,https://www.googleapis.com/auth/classroom.profile.emails,https://www.googleapis.com/auth/classroom.profile.photos,https://www.googleapis.com/auth/classroom.rosters.readonly,https://www.googleapis.com/auth/calendar,https://www.googleapis.com/auth/calendar.readonly,https://www.googleapis.com/auth/calendar.events,https://www.googleapis.com/auth/calendar.events.readonly,https://www.googleapis.com/auth/calendar.settings.readonly
8. Click Authorise
Bromcom MIS Configuration
There is a dedicated page within the Bromcom MIS, which provides all the Configurations Settings to Setup Provisioning between the Bromcom MIS and your Google Tenant.
Login to the Bromcom MIS and go to Config>Setup>Google Integration
If you are successfully licensed, you will be presented a with the G Suite Tenancy page.
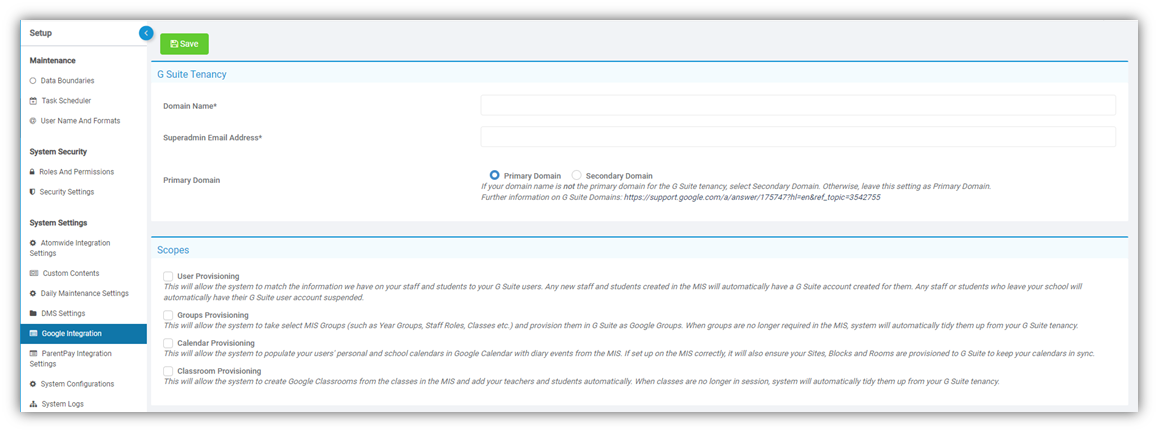
- Domain – enter the school’s Domain Name that you want the Bromcom MIS to manage the User Provisioning for you.
Example – bromcomtechnologyschool.com
- Superadmin Email Address – enter a valid Superadmin email address that this Domain has full access to carry out all provisioning actions. Any operations will be carried out by using this account, to make auditing easier, you can create a specific Superadmin account for Bromcom and use it in here
Example – mis-admin@bromcomtechnologyschool.com

Once you are happy with the Configuration, click the Save button. If everything is correct the Settings will be Confirmed and Saved and you will see a Remove Configuration button is displayed. This means all the Settings are Configured and the two systems are connected successfully. If you get an Error Message, this could be the API Access which can sometimes take up to 30 minutes to propagate. If the Error continues after 30 minutes, please re-check the API Access has been created with the correct Values Set and no spaces have been left at the beginning or at the end when copied from this document.
Scope Configuration
User Provisioning
This will allow the system to match the information we have on your Staff and Students to your G Suite Users. Any new Staff and Students created in the MIS will automatically have a G Suite Account created for them. Any Staff or Students who leave your school will automatically have their G Suite User Account suspended.
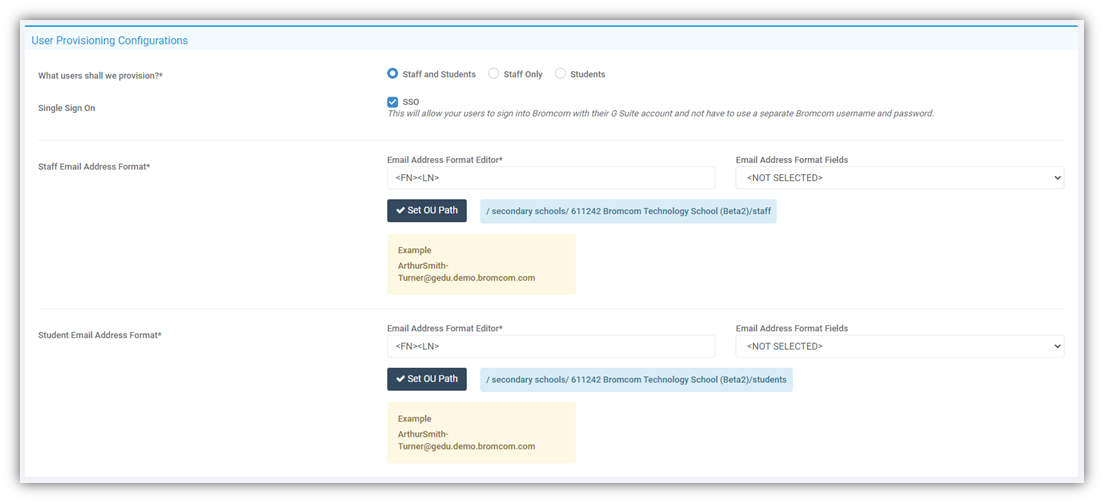
Once this option is ticked the User Provisioning Configurations panel will display where you can Configure the User Sync, what email address format you want to create for Students and Staff and Set OU Path (Organisational Unit) for Students and Staff. If you do not set this option the system will generate its own OU Structure.
You can also Configure the system to set Single Sign–On. If this option is ticked the system will associated the Google Account to the Staff’s Bromcom Account (if there is one created for the User).
User Sync page has following options:
- Sync User – when selected the system will match the Users based on their work email address in Student and Staff Details, if there is no match a Google Account will be created for each Member of Staff and Student. This option can take sometimes more than 20 minutes to run and in rare occasions the Google API may reject due to high volume, if this happens you will need to run the Sync User again manually the system will continue from where it left off.
- Simulate Sync User – this option simulates the Sync User option. This option DOES NOT create or update any Accounts, it will just give a summary of what will happen. You can check the summary before you execute the actual Sync User option. This option is very useful when running the provisioning for the first time, so you can make sure the system will not do anything unexpected.
- Manual Match – if the system cannot match Users automatically, to avoid duplicate Account creations, you can use this option to manually match Student or Staff records with a Google Account. This option is very useful, if the person, who manages the Google Integration, does not have Student details records or does not have permission to update email records.
- Create User – this option allows you to create Google Accounts based on selected Student or Staff.
- Sync Exclusion – this option can be used to exclude any Student or Member of Staff from the User Sync operations, so the system does not automatically Create or Deallocate Accounts for these Users. This option is mainly useful for Trusts, who have Central Management Records where their email address sits on a different Domain and should not be managed by this system.
- Class Sync Exclusion – this option can be used to exclude specific Teaching Classes from the Classroom Sync process for any that you do not wish to sync across from your MIS.
IMPORTANT NOTE: Before Google Accounts are created for any Staff or Students the system will check EMAIL records associated for each Member of Staff and Student and see if there is already a Google Account generated in Google Tenant, if any WORK email record is found, the system will match the Student or Member of Staff with that Google Account automatically without checking the Google Account’s email address.
Groups Provisioning
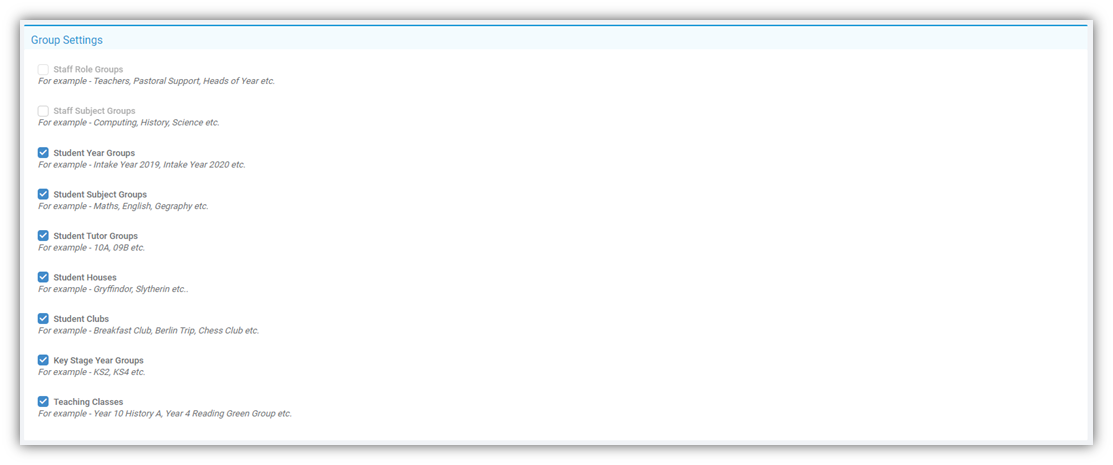
This will allow the system to select MIS Groups (such as Year Groups, Staff Roles, Classes etc.) and provision them in G Suite as Google Groups. When Groups are no longer required in the MIS, the system will automatically tidy them up from your G Suite Tenancy.
Configuring this is simple, you need to select the Group Types/Options available and the system will generate these Google Groups (not classrooms – that’s a separate option) automatically and attach the members based on User Sync Mappings created in the first place.
The Group Sync page allows you to Include or Exclude Users (Students or Staff) manually if needed. Staff are automatically added as Managers and Students are automatically added as Members.
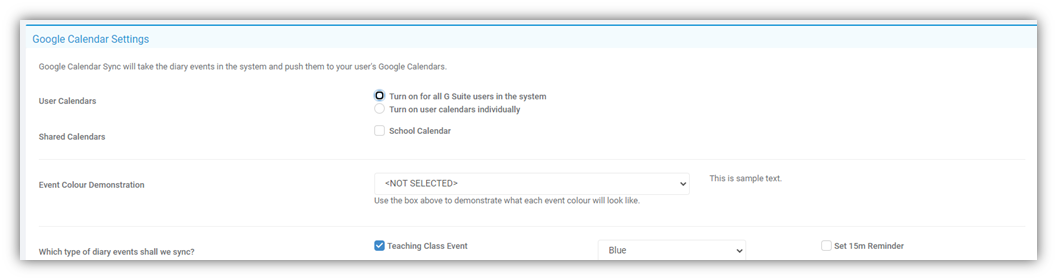
Calendar Provisioning
This will allow the system to populate your Users’ personal and school calendars in Google Calendar with Diary Events from the MIS. If setup on the MIS correctly, it will also ensure your Sites, Blocks and Rooms are provisioned to G Suite to keep your Calendars in sync.
There are two options to work with; either you can choose System to push all Calendar Events from the Bromcom MIS to Google Tenant or you can manually add Users. Depending on what option selected, the Calendar Sync page allows you to manage those Users manually.
Calendars are sync’ed based on the Complete Diary view under Diary module. Whatever you can see on the Diary module, you can configure to be selected to be sync’ed, each Event type can be configured in different colours and you can decide if you want to set a reminder or not.
Classroom Provisioning
This will allow the system to create Google Classrooms from the Classes in the MIS and add your Teachers and Students automatically. When classes are no longer in session the system will automatically tidy them up from your G Suite Tenancy.
Classroom Provisioning does not have any finer Configuration options. It is either ON or OFF. This Provisioning tool finds all Classes and Tutor Groups and creates Classroom records under Google Tenant and allocates the Staff or Students accordingly.
- Sync All Courses – when this option is used, it finds all Classes and Tutor Groups active today and if they are not Classroom (course) record created within Google Tenant, the system creates again. Unfortunately, there is not a way to match Classrooms automatically. If you require your existing Classroom records mapped to Classes/Tutor Groups, please use the Match from CSV option
- Simulate Sync Courses – this option simulates the Sync All Courses option. This operation does not create, update or delete any Classrooms. This may take up to 5 minutes to run and at the end of the operation the system will return a summary pop-up which details what will happen as result of this Sync. We advise you to run this simulation before you run actual Sync.
- Manual Match – this option can be used to import Classroom and MIS Class/Tutor Group Mappings in bulk. This will require 2 columns in CSV, one is for the Google ID and other one for the Group ID within the MIS (which can be obtained via AdHoc Reporting)
- Match from CSV – this option can be used to match existing Classroom and MIS Class/Tutor Groups via a CSV file.
- Create Course – you can use this option to create any Classroom record manually.